 Th
Th Eng
Eng


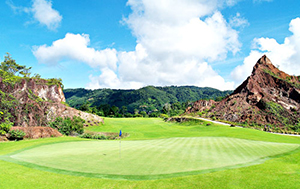
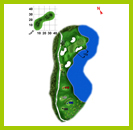
Red Mountain Golf Club
Golf » Red Mountain Golf Club
The Most Challenging golf course in Phuket, Thailand. This brand new 18-hole course is Loch Palm’s sister course.
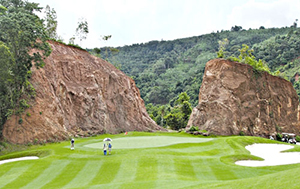
Winding its way through a truly dramatic 1400 rai former tin mine site in the heart of Phuket, Red Mountain is surely one of Asia’s most exciting new courses. The course has been cleverly routed to take advantage of a huge variety of landforms and dizzying elevation changes. Scars left from the tin mine era have been imaginatively incorporated into the overall scheme, creating a unique character at the same time as establishing an indelible link with an important era in the Island’s past.
We offer specials price for you. please contact us …
Tel : 088-7653127, 081-8938358, 076-522863
E-Mail : PhuketNavigator@hotmail.com
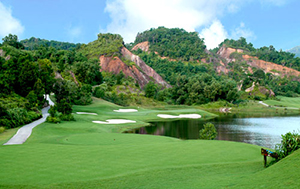
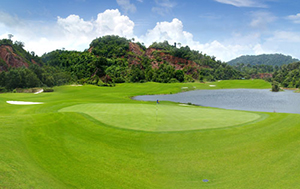

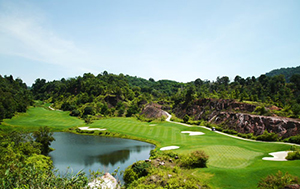
Designer Jon Morrow and co-designer Al Tikkanen, have created a highly strategic and challenging 6,900 yard lay out to complement the shorter and gentler old Loch Palm Course. While the course is undoubtedly challenging, numerous risk and reward options create a fun playing environment, an exhilarating test of golf and a breathtaking scenic tour around a course destined to become a golfing landmark in the region.
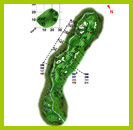
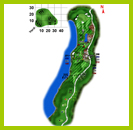
Red Mountain Golf Club Scorecard
| HOLE No. | 1 | 2 | 3 | 4 | 5 | 6 | 7 | 8 | 9 | OUT | 10 | 11 | 12 | 13 | 14 | 15 | 16 | 17 | 18 | IN | OUT |
| H.S | 9 | 5 | 15 | 11 | 3 | 1 | 17 | 13 | 7 | 36 | 8 | 14 | 10 | 2 | 6 | 12 | 16 | 18 | 4 | ||
| BLACK | 398 | 484 | 167 | 543 | 432 | 480 | 213 | 337 | 351 | 3405 | 440 | 385 | 514 | 454 | 191 | 363 | 301 | 169 | 559 | 3376 | 6781 |
| BLUE | 366 | 476 | 154 | 513 | 398 | 451 | 189 | 305 | 332 | 3184 | 409 | 357 | 488 | 426 | 172 | 342 | 283 | 155 | 525 | 3157 | 6341 |
| WHITE | 335 | 455 | 137 | 491 | 371 | 434 | 161 | 275 | 308 | 2967 | 390 | 336 | 461 | 371 | 159 | 325 | 274 | 140 | 502 | 2958 | 5925 |
| RED | 293 | 349 | 116 | 461 | 348 | 353 | 138 | 242 | 258 | 2558 | 342 | 277 | 440 | 321 | 130 | 306 | 258 | 121 | 450 | 2645 | 5203 |
| PAR | 4 | 5 | 3 | 5 | 4 | 4 | 3 | 4 | 4 | 36 | 4 | 4 | 5 | 4 | 3 | 4 | 4 | 3 | 5 | 36 | 72 |
| PLAYER | HANDICAP | ||||||||||||||||||||
| MARKER | NET SCORE | ||||||||||||||||||||
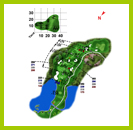
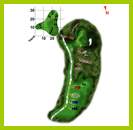
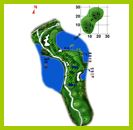
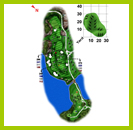
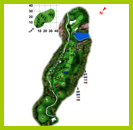
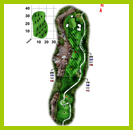
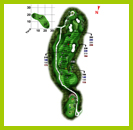
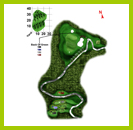
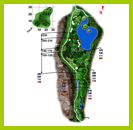
Red Mountain Golf Club Course Guide
 |
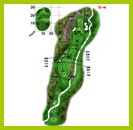 |
Hole 1 Built with multiple teeing areas, the longest par 3 on the course requires a variety of shots Depending on tee and hole location and wind direction. With the hole cut back left, and tees back, green contours favour a running draw. Tees and hole on the right side mean a soft high fade is required.
|
|||||||
| |
 |
Hole 2 Elevated tees accentuate the presence of wind, meaning this hole can be brute or a baby. There are clearly 3 options from the tee on this ‘S’ shaped hole with water left and right. The more one risks from the tee, the less water that needs to be carried on the approach and the more green is available to work with on the approach.
|
|||||||
| |
 |
Hole 3 Dramatic elevated tees literally sculpted out of the mountain leave a beautiful but intimidating view of the narrow ninth fairway. The keys to this hole are wind and the large tree obscuring much of the left side of the fairway.
|
|||||||
| |
 |
Hole 4 Though this is a very wide fairway, the ideal line is fraught with danger. The hole can be shortened in different ways when selecting the ‘low’ road. Take careful note of wind and yardage over the last of the left side fairway bunkers. Long hitters may be able to ‘fly’ these bunkers; short hitters who successfully skirt or draw the ball around them will catch extra roll from the down slope.
|
|||||||
| |
 |
Hole 5 Contrasting with the previous hole, Players should stay on the high right hand side of the 2 level fairway to make the approach on this short par 4 easier. Only the top of flag will be visible from the lower left fairway and a nasty pot bunker will be more in play from this angle of approach to this very small plateau green.
|
|||||||
| |
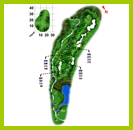 |
Hole 6 Risk reward options are there for all to see from tee. Long hitters should take on as much of the marsh and bunkers as they dare to leave a long iron into this par 5 green. But beware the sucker bunker at end of fairway!2nd shots also provide playing options. Staying right, whether short or over the long waste bunker, will offer the easiest approach angle to green.
|
|||||||
| |
 |
Hole 7 So named because of the green setting among a crater rich in white dragon seams, this ‘monster’ par 4 is probably the most difficult hole on the course and the start of the ‘home’ stretch. The fairway is wider than it appears from the tee though there is very little playable rough. Stay left from the tee for easier an approach to green.
|
|||||||
| |
 |
Hole 8 Though the hole can be set up many ways, depending on selected tee and hole locations, the bottom line is accuracy. Players who can shape the ball have an advantage with a 50 yard long green angled into the lake from left to right. Risk reward is again on offer. Only the brave (and foolish) will play for the back, right hole location. Others play safe to the front half of the green and take their chances of 2 putting.
|
|||||||
| |
 |
Hole 9 Accuracy is essential. Though barely over 300 yards only heroes and zeros will risk driver on this hole. Play your best long iron or straightest wood club to the left side of the turn point and then a short iron up to an elevated green.
|
|||||||
| |
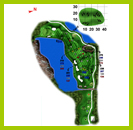 |
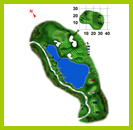
Hole 10 At the 16th tee kiosk, you are sitting at by far the highest point on a Phuket Golf Course, more than 330 feet above the 14th green, so breathe deeply before selecting your strategy on this devilish short but stunningly pretty par 4
|
|||||||
| |
 |
Hole 11 The green centre is nearly 150 feet below the Pro tee. Wind felt at the tee may not affect your shot as expected down below! Take 2 clubs less than normal and swing easy to keep the ball flight lower. The green is huge, but you must find the right part of the green to avoid 3 putts.
|
|||||||
| |
 |
Hole 12 Though long on the scorecard, accuracy is again the key as almost all straight drivers will reach 300 yards and more. Your stance on this ‘roller coaster’ fairway will dictate your second shot strategy. Water waits on the right, the Canyon on the left and numerous bunkers for slightly misplaced shots.
|
|||||||
| |
 |
Hole 13 Setting the tone for the entire round, risk reward options are presented from the outset. Only very confident drivers will take on the narrow, blind landing area. A lost ball is almost certain for failure to hit the fairway. On the first shot of the day, the best strategy may be to play to the wide, visible landing area and have faith in your accuracy from a flat lie with a mid-iron to the green.
|
|||||||
| |
 |
Hole 14 A short par 5 a very wide fairway is rarely seen on modern courses, but this tee shot provides a welcome opportunity for golfers to ‘open up’ with the driver early in the round. Drives played up the more dangerous left side create better visibility and easier playing angles for the second and approach shots. The elevated green is perhaps the most severe on the course and strong players must beware of too much spin on approach.
|
|||||||
| |
 |
Hole 15 The unique green setting, created by years of storm water run off through sandy tailings, is another but different reminder of the mining history of the site. Short is dead, so accurate club selection is vital. Best percentage strategy may be to err long and right if you can trust your short to get up and down from the putting hollow behind.
|
|||||||
|
 |
Hole 16 Although long, this down hill, double dog leg pay 5 can be reached in two by the longer hitters. The perfect drive is left to right favouring the right, while the second shot must be played low and right to left from a down sloping fairway to take advantage of ground contours on the approach. This is a hole that truly rewards shotmakers.
|
|||||||
| |
 |
Hole 17 Hole location and your length will dictate your strategy here. Most strong hitters will lay back from the tee short of the left side sand bunker and the right side grass bunker.
|
|||||||
|
 |
Hole 18 On the course’s longest par 4, long hitters are encouraged to really let loose off the tee. The 6th, one of the course’s widest fairways, is divided by a central fairway bunker and flanked by a steep fall off and waste bunkers the entire length of the right side. Depending on tees used and player’s trajectory, shorter hitters have to decide to play to the high or the (more dangerous) low road. Trees, bunkering and contours at the Green entrance are designed to reward approach shots from the right. Miss the green left for an easier up and down.
|
Red Mountain Golf Club Price
| Period | Holes | Green Fee Only | 1 Golfer Package | 2 Golfers Package | 3 Golfers Package | 4 Golfers Package |
|---|---|---|---|---|---|---|
| Green fee + round-trip transfers (price per person) | ||||||
| Now to 31 October 2014 |
9 Holes | Special | Special | Special | Special | Special |
| 18 Holes | Special | Special | Special | Special | Special | |
Rate:
- Rates are in Thai Baht and are inclusive of applicable government taxes.
- rate are effective november 1, 2013 until october 31, 2014
Golfer:
- The Phuket Country Club is a walking course and golf cart are not available.
- Each golfer is required to take a caddy.
- Collared polo shirt with tailored slacks or shorts, sock and golf shoes with soft spikes.
Golf Cart :
- One golfer to a cart.
Caddy tip:
- Recommended caddy tip 300 Baht/18Holes. You can give directly to your caddy after the game.
Non – Golfer:
- Accompanying non -golfer will be charged 400 Baht. You can be paid directly to the golf course.
- Collared polo shirt with tailored slacks or shorts,s ock and golf shoes with soft spikes.